Amazon WorkSpaces Pools: Cost-effective, non-persistent virtual desktops

You can now create a pool of non-persistent virtual desktops using Amazon WorkSpaces and share them across a group of users… Amazon WorkSpaces Pools (non-persistent desktops) WorkSpaces Pools ensures that each user gets the same applications and the same experience… When the user logs in, they …
You can now create a pool of non-persistent virtual desktops using Amazon WorkSpaces and share them across a group of users. As the desktop administrator you can manage your entire portfolio of persistent and non-persistent virtual desktops using one GUI, command line, or set of API-powered tools. Your users can log in to these desktops using a browser, a client application (Windows, Mac, or Linux), or a thin client device.
Amazon WorkSpaces Pools (non-persistent desktops)
WorkSpaces Pools ensures that each user gets the same applications and the same experience. When the user logs in, they always get access to a fresh WorkSpace that’s based on the latest configuration for the pool, centrally managed by their administrator. If the administrator enables application settings persistence for the pool, users can configure certain application settings, such as browser favorites, plugins, and UI customizations. Users can also access persistent file or object storage external to the desktop.
These desktops are a great fit for many types of users and use cases including remote workers, task workers (shared service centers, finance, procurement, HR, and so forth), contact center workers, and students.
As the administrator for the pool, you have full control over the compute resources (bundle type) and the initial configuration of the desktops in the pool, including the set of applications that are available to the users. You can use an existing custom WorkSpaces image, create a new one, or use one of the standard ones. You can also include Microsoft 365 Apps for Enterprise on the image. You can configure the pool to accommodate the size and working hours of your user base, and you can optionally join the pool to your organization’s domain and active directory.
Getting started
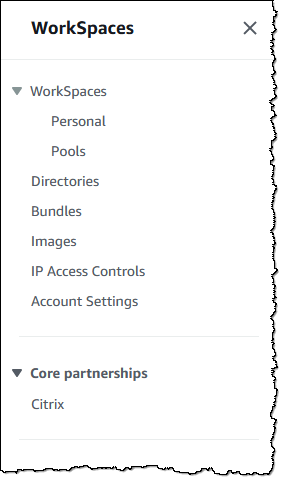
Let’s walk through the process of setting up a pool and inviting some users. I open the WorkSpaces console and choose Pools to get started:

I have no pools, so I choose Create WorkSpace on the Pools tab to begin the process of creating a pool:

The console can recommend workspace options for me, or I can choose what I want. I leave Recommend workspace options… selected, and choose No – non-persistent to create a pool of non-persistent desktops. Then I select my use cases from the menu and pick the operating system and choose Next to proceed:

The use case menu has lots of options:

On the next page I start by reviewing the WorkSpace options and assigning a name to my pool:

Next, I scroll down and choose a bundle. I can pick a public bundle or a custom one of my own. Bundles must use the WSP 2.0 protocol. I can create a custom bundle to provide my users with access to applications or to alter any desired system settings.

Moving right along, I can customize the settings for each user session. I can also enable application settings persistence to save application customizations and Windows settings on a per-user basis between sessions:

Next, I set the capacity of my pool, and optionally establish one or more schedules based on date or time. The schedules give me the power to match the size of my pool (and hence my costs) to the rhythms and needs of my users:

If the amount of concurrent usage is more dynamic and not aligned to a schedule, then I can use manual scale out and scale in policies to control the size of my pool:

I tag my pool, and then choose Next to proceed:

The final step is to select a WorkSpaces pool directory or create a new one following these steps. Then, I choose Create WorkSpace pool.
After the pool has been created and started, I can send registration codes to users, and they can log in to a WorkSpace:
I can monitor the status of the pool from the console:
Things to know
Here are a couple of things that you should know about WorkSpaces Pools:
Programmatic access – You can automate the setup process that I showed above by using functions like CreateWorkSpacePool, DescribeWorkSpacePool, UpdateWorkSpacePool, or the equivalent AWS command line interface (CLI) commands.
Regions – WorkSpaces Pools is available in all commercial AWS Regions where WorkSpaces Personal is available, except Israel (Tel Aviv), Africa (Cape Town), and China (Ningxia). Check the full Region list for future updates.
Pricing – Refer to the Amazon WorkSpaces Pricing page for complete pricing information.
Visit Amazon WorkSpaces Pools to learn more.
— Jeff;
Author: Jeff Barr


