

Streamlining generative AI development with MLflow v3.10 on Amazon SageMaker AI
Today, we’re excited to announce that Amazon SageMaker AI MLflow Apps now support MLflow version 3… Building on the foundations established with Amazon SageMaker AI MLflow Apps, this latest version introduces powerful new features for observability, evaluation, and generative AI development that…
Today, we’re excited to announce that Amazon SageMaker AI MLflow Apps now support MLflow version 3.10, bringing enhanced capabilities for generative AI development and streamlined experiment tracking to your generative AI workflows. Building on the foundations established with Amazon SageMaker AI MLflow Apps, this latest version introduces powerful new features for observability, evaluation, and generative AI development that help data scientists and ML engineers accelerate their AI initiatives from experimentation to production.
In this post, we’ll explore what’s new in MLflow v3.10, walk you through getting started with SageMaker AI MLflow Apps, and how to leverage these enhancements to build generative AI applications.
What’s new in MLflow v3.10
MLflow 3.10 introduces a set of targeted improvements to the MLflow ecosystem that extend the tracing and observability capabilities established in MLflow 3.0, with a particular focus on generative AI application development and agentic workflows. On the generative AI front, this release delivers improved tracing for complex multi-turn workflows, tighter integration with popular LLM frameworks and libraries, and streamlined logging for generative AI interactions and invocations. Evaluation receives a substantial upgrade through the mlflow.genai.evaluation() API, which provides a programmatic interface for systematically measuring and maintaining generative AI quality across the development-to-production lifecycle with built-in metrics covering relevance, faithfulness, correctness, and safety—all of which integrate seamlessly with SageMaker AI workflows.
Observability improvements include more granular trace filtering and search, richer metadata capture for debugging and root-cause analysis, and pre-built performance dashboards that surface workload level metrics—latency distributions, request counts, quality scores, and token usage—at a glance without manual chart configuration, giving teams running production workloads clear visibility into operational costs while MLflow workspaces provide a structured way to organize MLflow artifacts across teams and projects, as shown below.

These improvements coupled with SageMaker AI provide an enterprise-grade generative AI infrastructure, making it straightforward to track experiments, monitor generative AI performance, and maintain governance across AI applications at scale.
Getting started with SageMaker AI MLflow App v3.10
For new users, creating a SageMaker AI MLflow App is straightforward through the SageMaker Studio console, AWS CLI, or API. The default configuration automatically provisions MLflow 3.10, giving you immediate access to all the latest capabilities.
You can get started with fully managed MLflow 3.10 on Amazon SageMaker AI MLflow Apps through the AWS Management Console, AWS Command Line Interface (AWS CLI), or API.
Prerequisites
To get started, you need:
- An AWS account with billing enabled
- An Amazon SageMaker Studio AI domain. To create a domain, refer to Guide to getting set up with Amazon SageMaker AI.
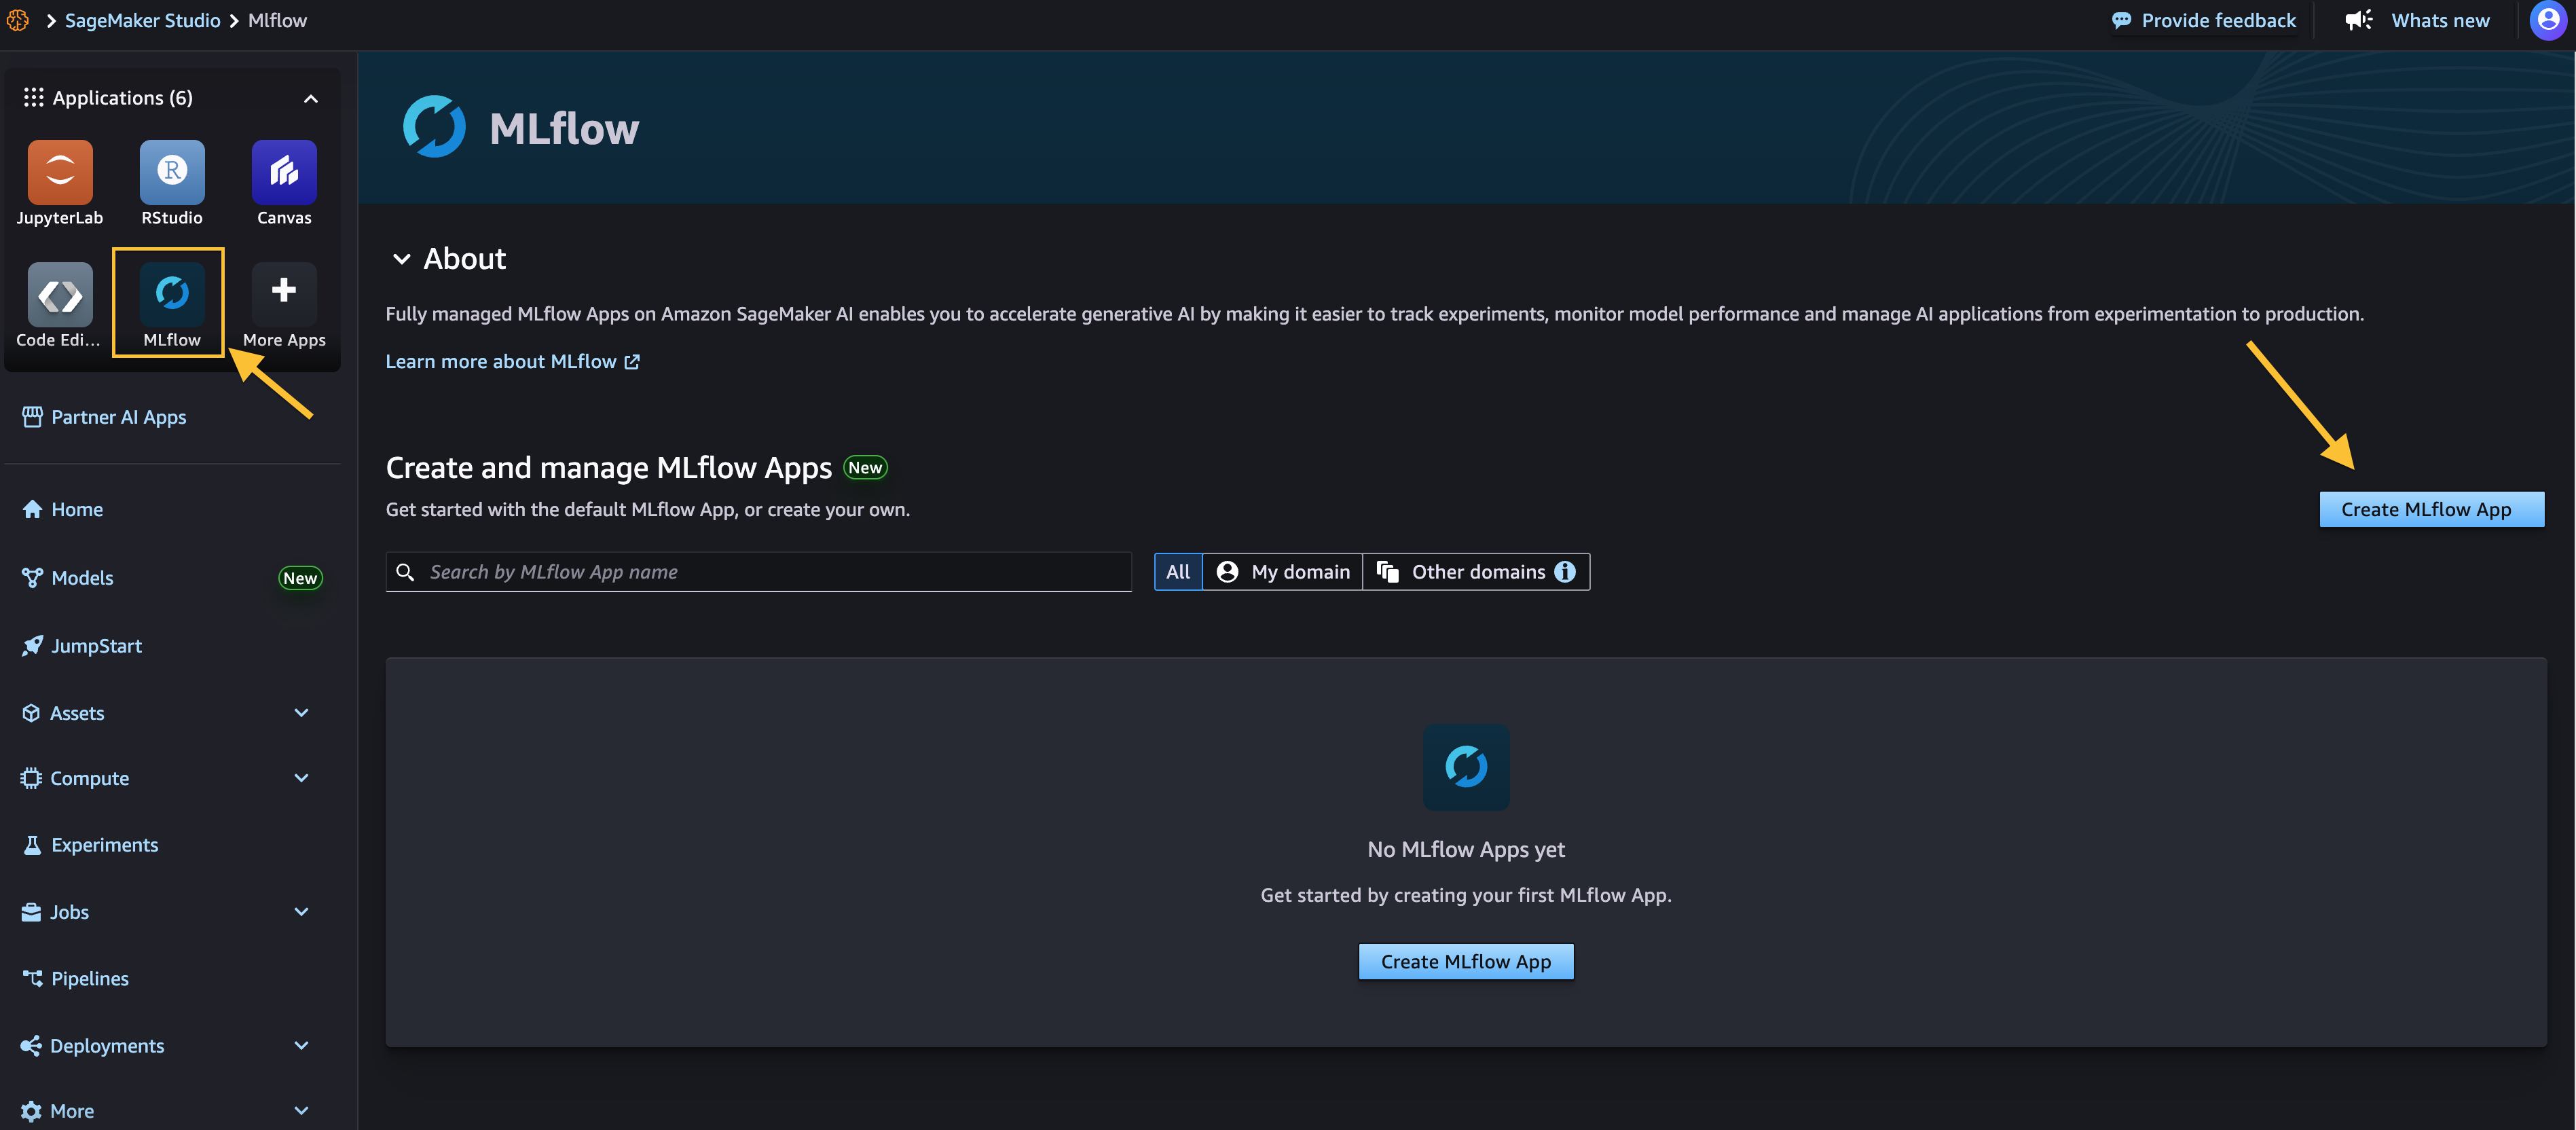
Next, navigate to Amazon SageMaker AI Studio console and select the MLflow application.
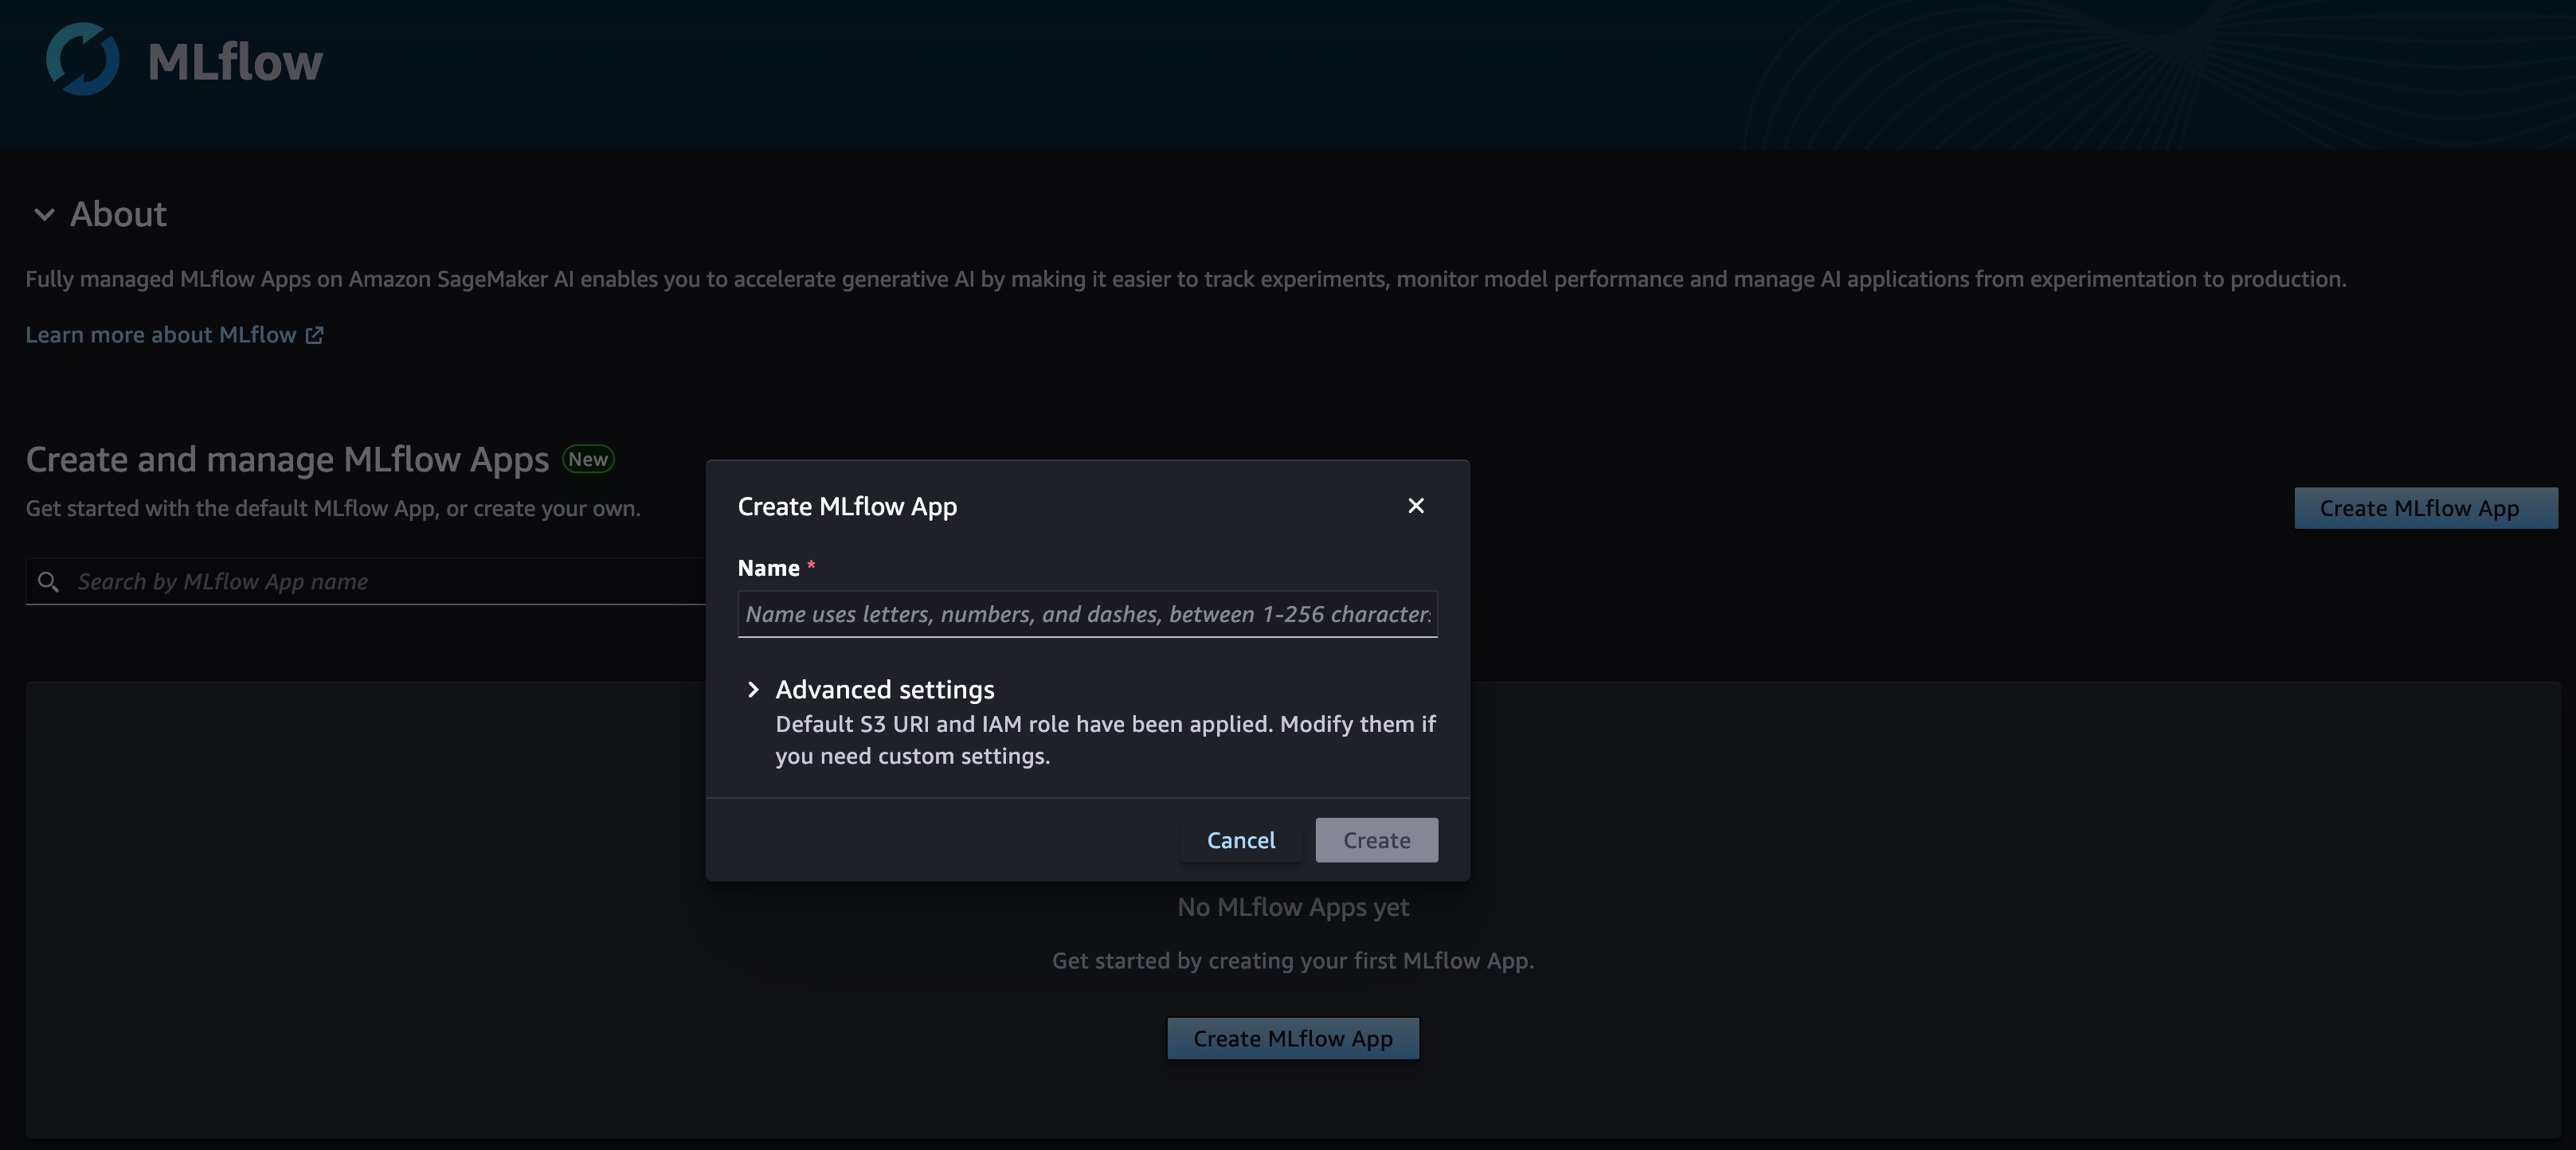
Choose Create MLflow App and enter a name. Here, we have both an AWS Identity and Access Management (IAM) role and Amazon Simple Service (Amazon S3) bucket already configured for you using the SageMaker AI Studio domain’s defaults. And you only need to modify them in the Advanced settings if needed, as shown below.
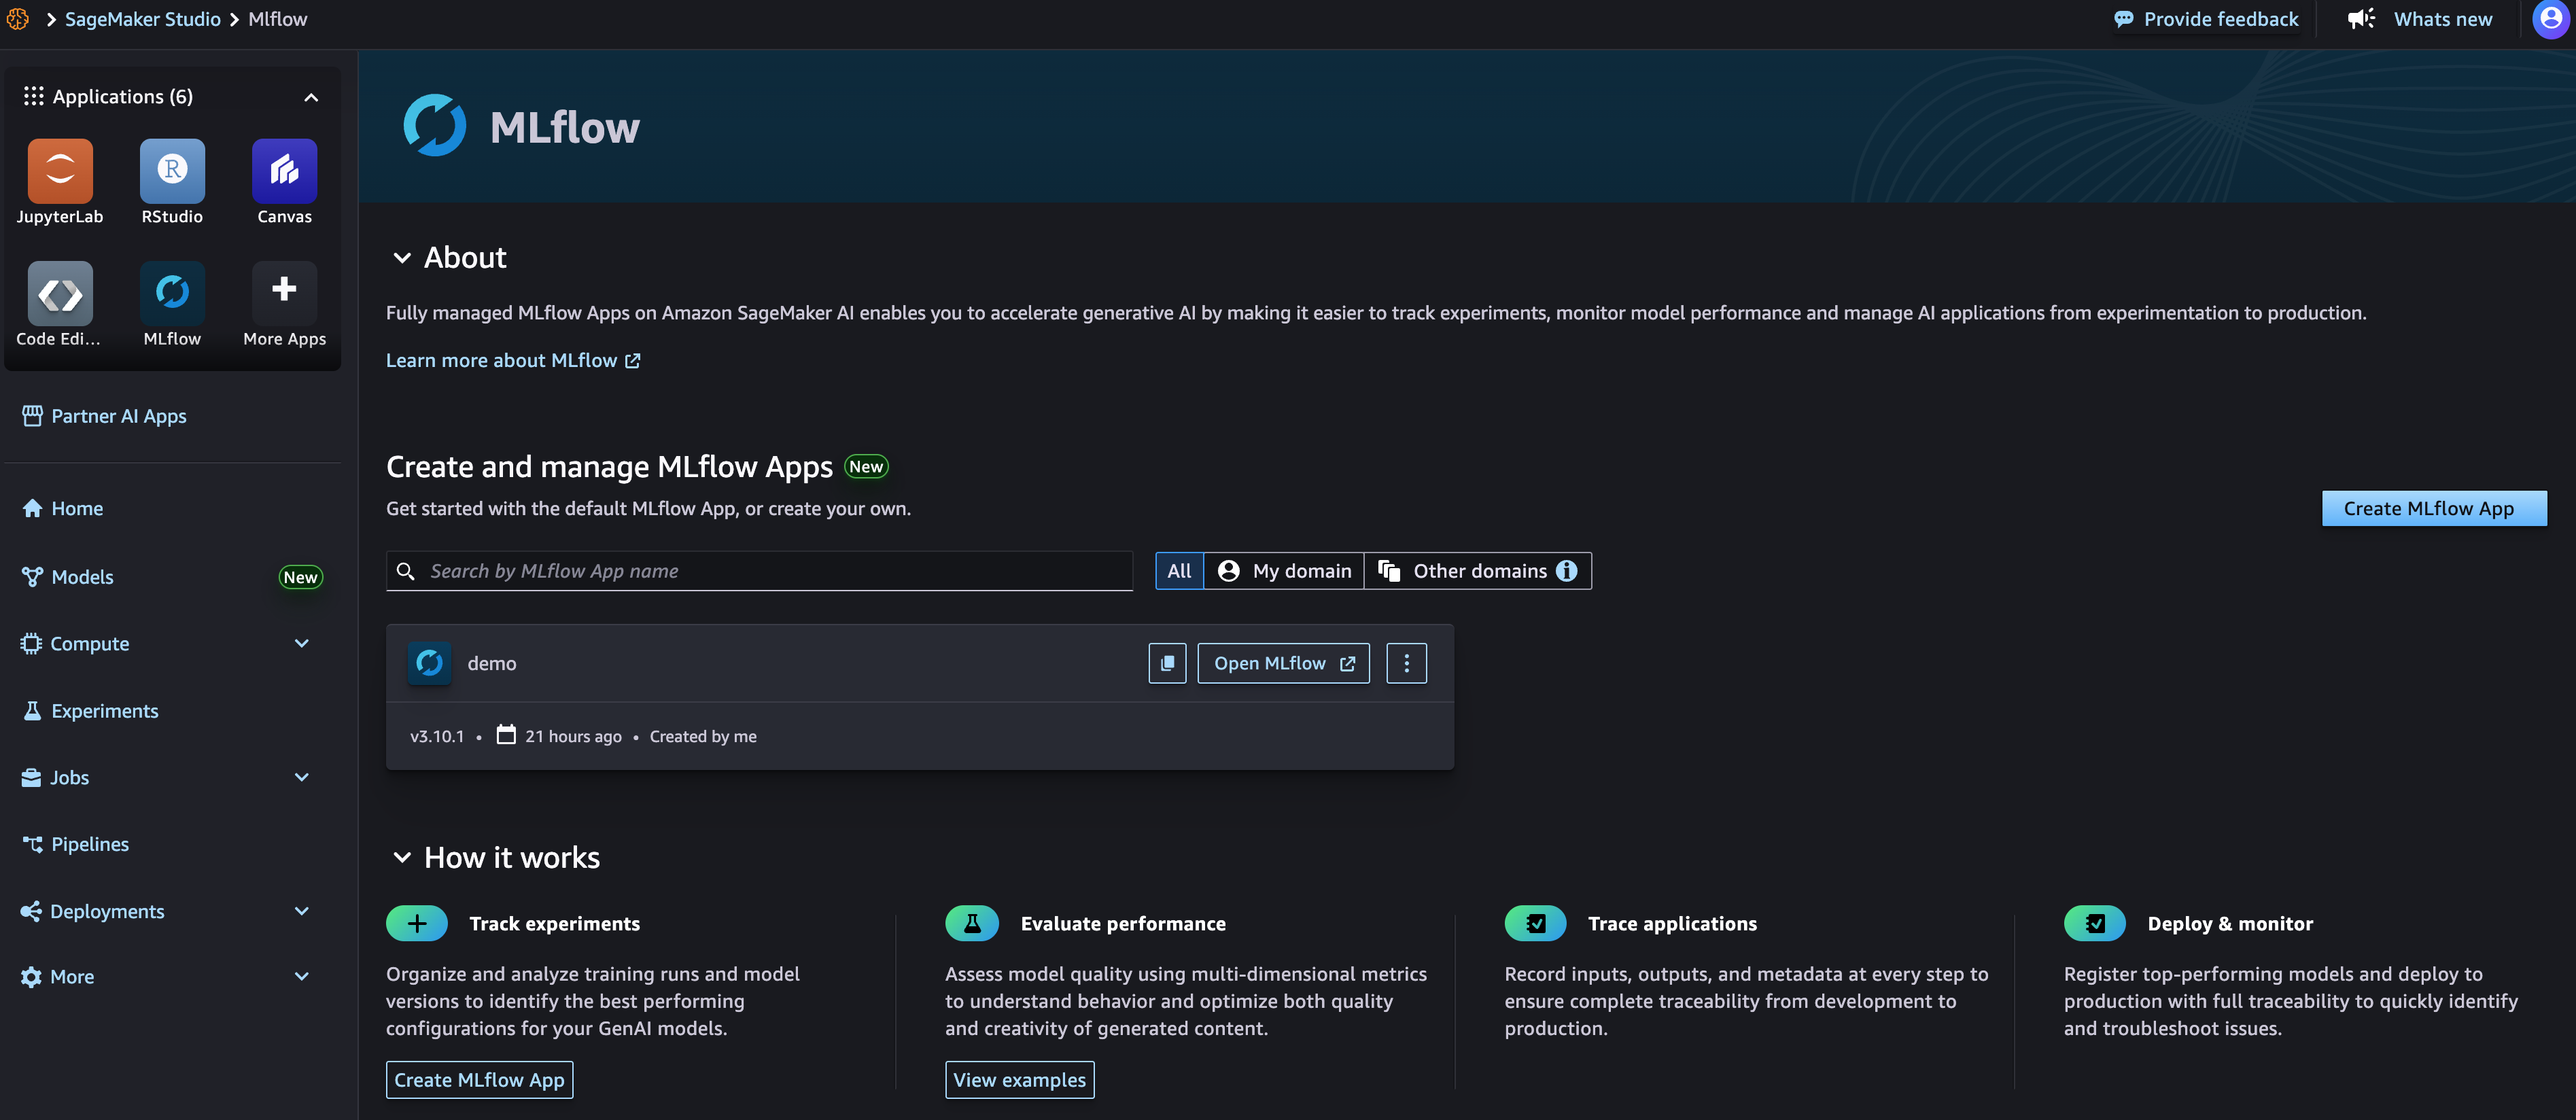
Once created, you receive an MLflow Amazon Resource Name (ARN) for connecting and you can immediately start using the newly created SageMaker AI MLflow App with MLflow v3.10 along with your existing code or you can follow along below to connect your code with SageMaker AI MLflow Apps.
To begin tracking your experiments with your newly created SageMaker AI MLflow App, you need to install both MLflow and the AWS SageMaker MLflow plugin in your environment. You can use SageMaker Studio managed Jupyter Lab, SageMaker Studio Code Editor, a local integrated development environment (IDE), or other supported environment where your AI workloads operate with SageMaker AI MLFlow Apps.
To install both the Python packages using pip:
pip install mlflow==3.10.1 sagemaker-mlflow==0.3.0
To connect and start logging your AI experiments, parameters, and models directly to SageMaker AI MLflow Apps, see the code snippet below to get started with your workload. Note, replace the Amazon Resource Name (ARN) with your SageMaker AI MLflow App ARN below.
Migration
If you have an existing MLflow Tracking Server or App hosted on SageMaker or elsewhere you can migrate to a new 3.10 app by following the instructions in the blog post Migrate MLflow tracking servers to Amazon SageMaker AI with serverless MLflow.
Conclusion
The introduction of MLflow v3.10 in Amazon SageMaker AI MLflow Apps represents a significant step forward in making enterprise AI development more efficient, observable, and manageable. Get started with by Amazon SageMaker AI MLflow Apps by visiting Amazon SageMaker AI Studio and creating your first MLflow App.
The new MLflow v3.10 is also supported in Amazon SageMaker AI serverless model customization and SageMaker Unified Studio, and for additional workflow flexibility.
Share your feedback with us through AWS re:Post for SageMaker or your usual AWS Support contacts.
About the authors
Author: Sandeep Raveesh-Babu